
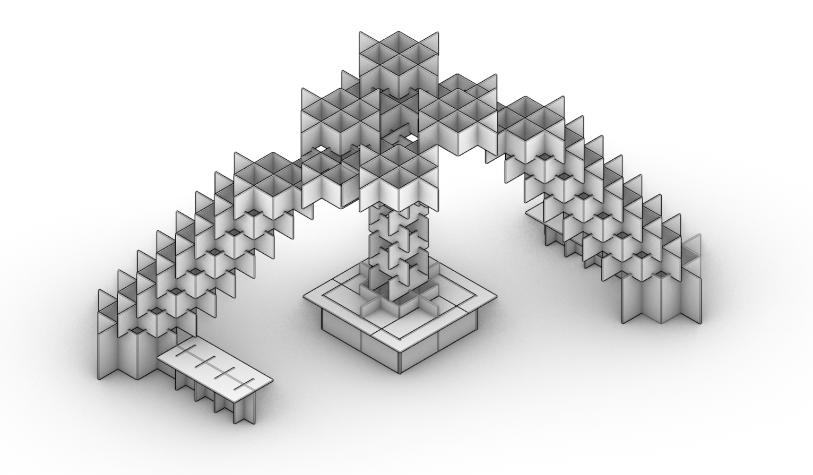
The Lattice Pavilion is inspired by the coming together of two cities: Lima, Peru and Philomath, Oregon. This is represented in two twisting arches spiraling upwards and meeting at a central pillar. The design offers a unique threshold experience or a space for repose.
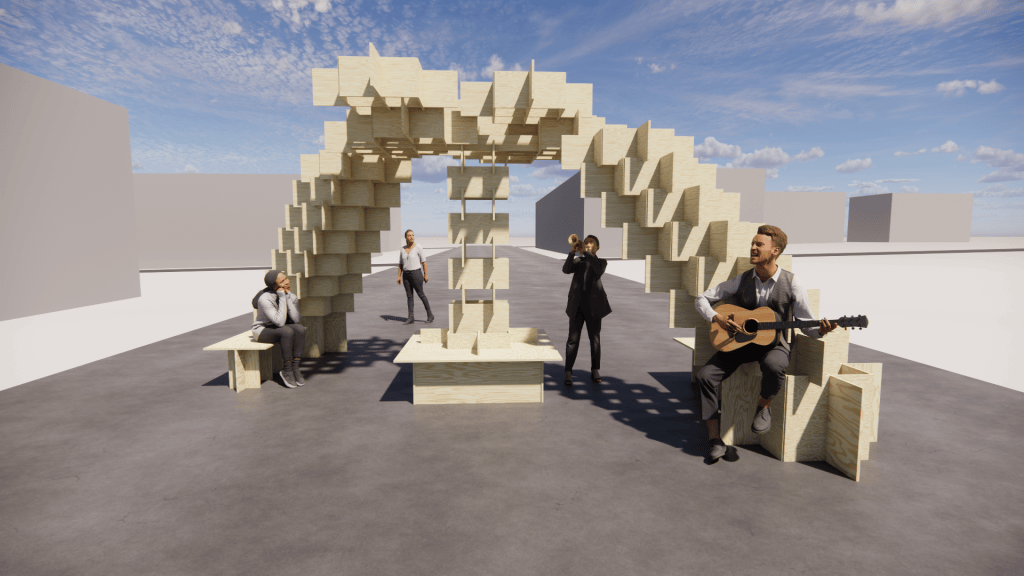
Design Approach
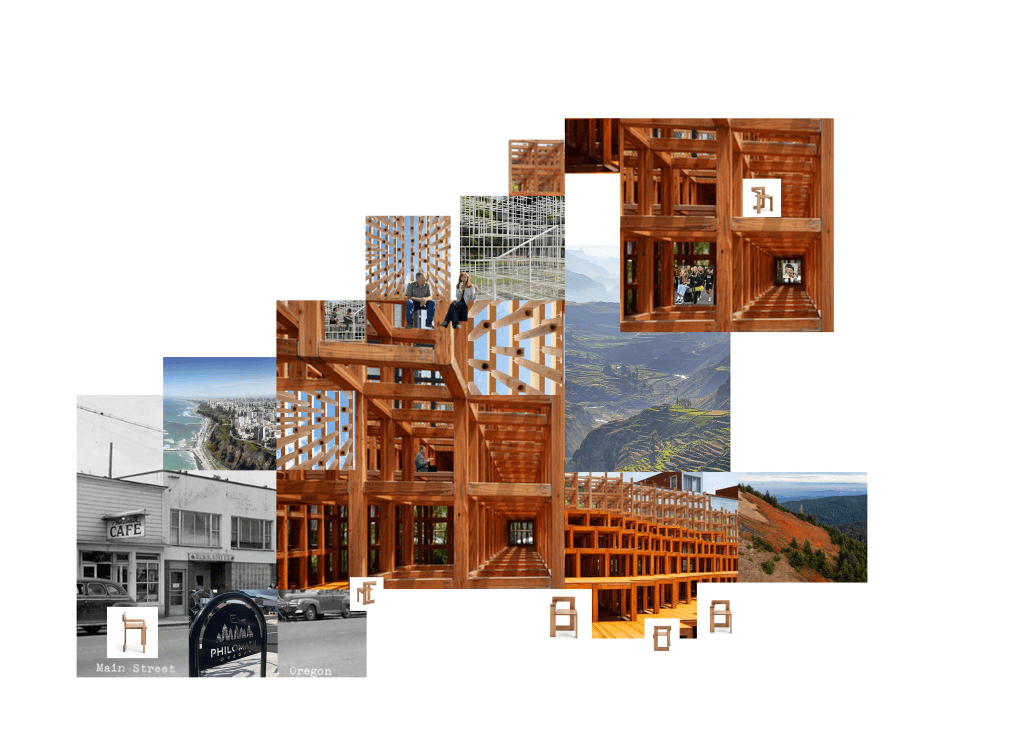
Collage was used as a design medium to visualize how the two cites could be represented in physical form as well as physical model making. Precedents such as The Forest Pavilion by IDS and half-lap joint furniture were used as inspiration. Through interviewing residents in Philomath, we learned seating is a priority for the pavilion, while a beautiful threshold experience is a priority for Lima.
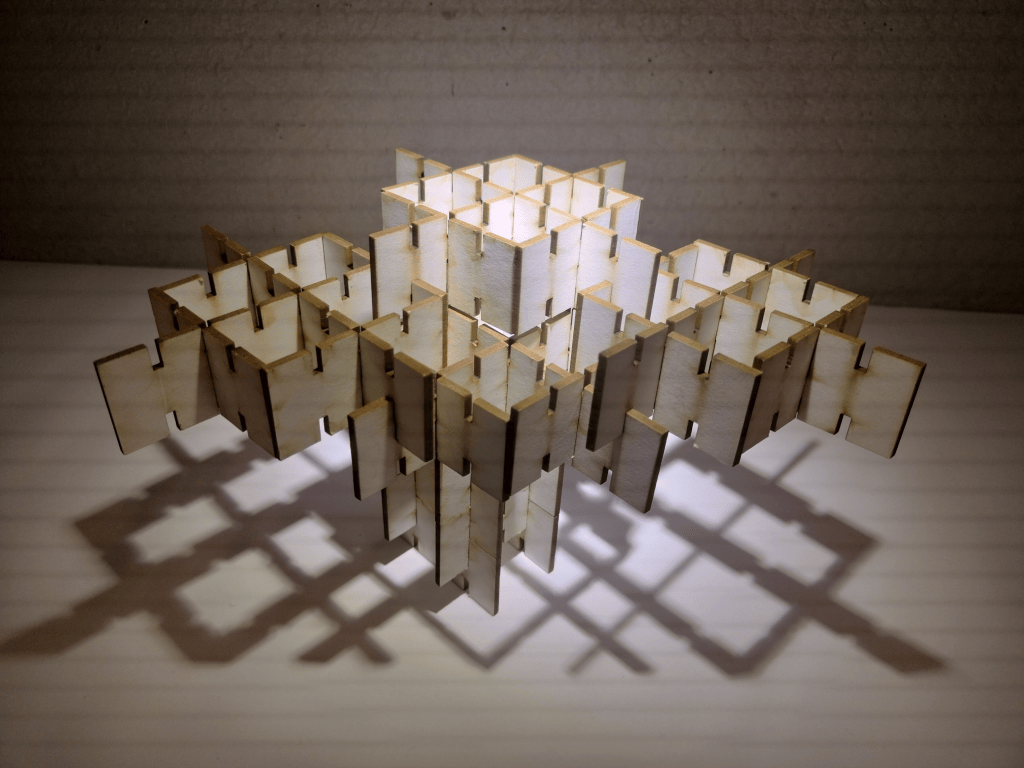
Our design team began by starting with the material itself and investigating possible joints through a ground up approach. The design challenge: Design a plywood pavilion though wood joinery without adhesives or fasters with twenty 8ft by 4ft plywood sheets. Our team determined the following design goals:
- Minimize small pieces
- Minimize material waste
- Maximize shadows for visual interest
- Maximize seating
Kit of Parts
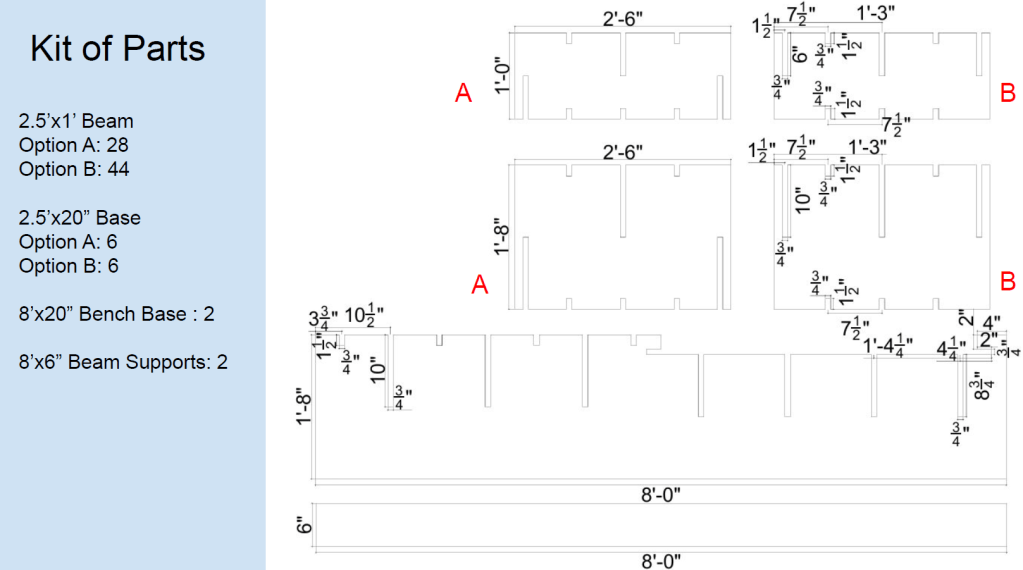
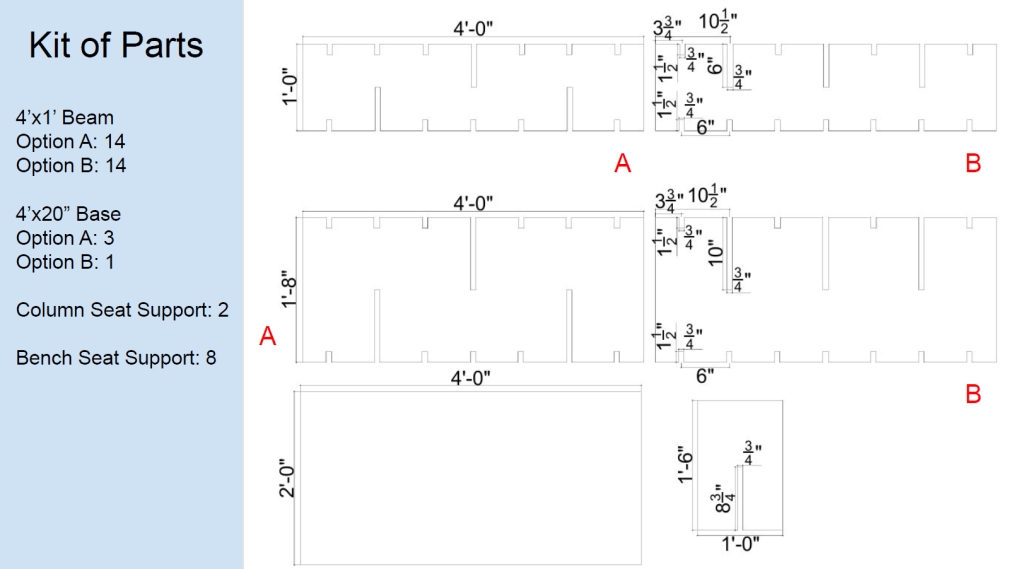
We investigated half-lap joints with unit members that fit the plywood material to minimize waste. Our first iteration included two primary members: 1ft by 2ft member and a 1ft by 4ft member thinking of the best size for one person to be able to move easily. Then we researched how to brace the joints laterally. Our primary members have 6″ notches on either side to secure members together as well as 1.5″ notches to build the structure up, increasing height with the least amount of material. Through a real scale model, a 1.5″ notch was determined to provide the best stability with the most height gain when lapping members.
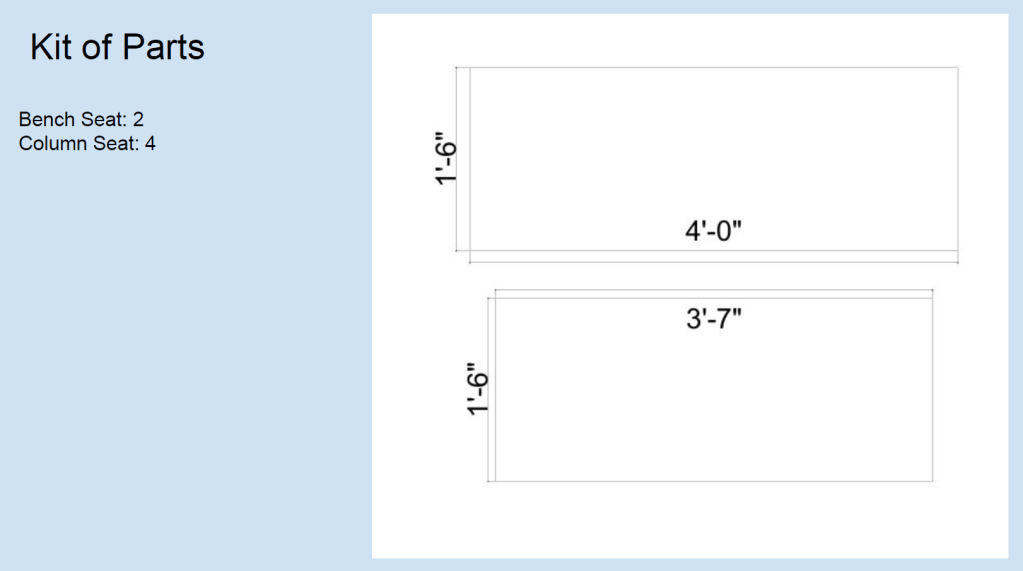
Here are the dimensions of our kit of parts module members:
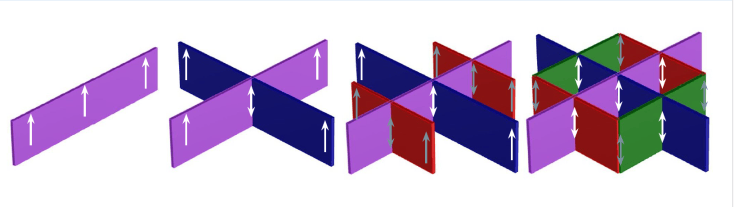
Here is an example of how our members are assembled to create the unit module. Care was taken to design the assembly to be as easy as possible to assemble, with no need to rotate members and all members slotting into each other in the downward direction.
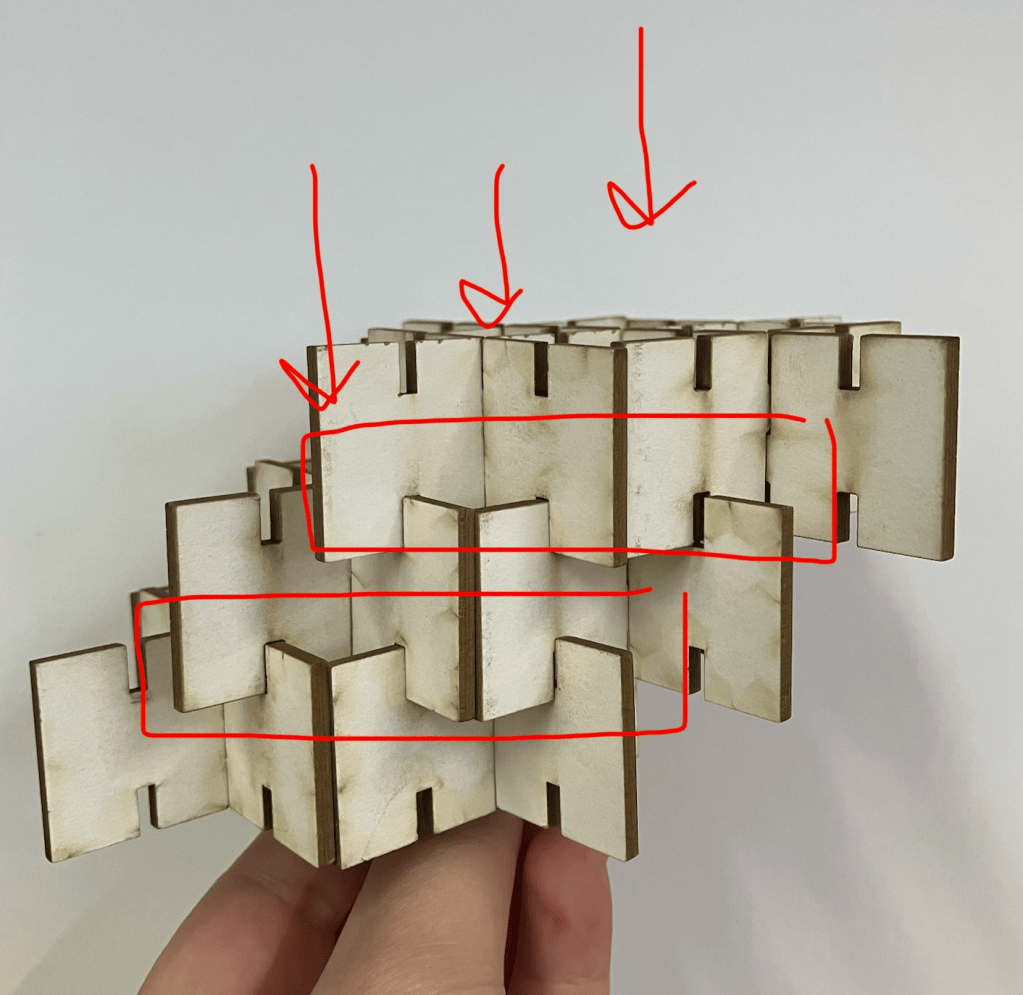
Joint
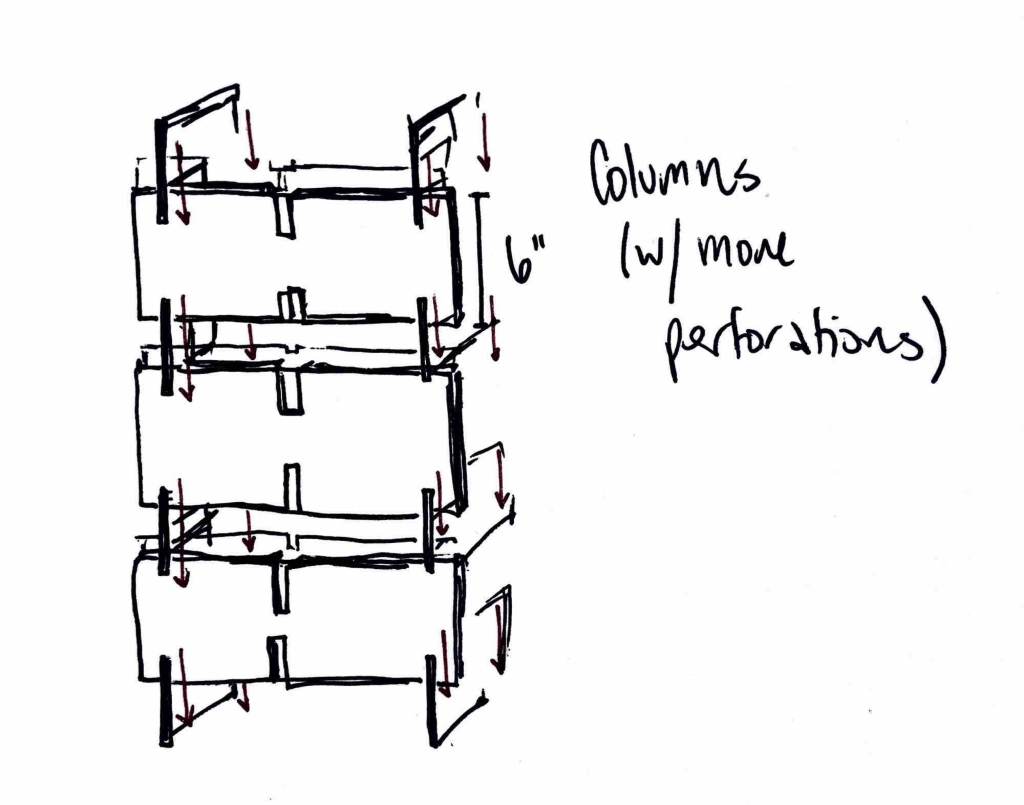
Here is an example of a possible way to secure the join in the lateral direction based on our research. Other ideas were tested such as creating tabs in the wood to secure the joint using the CNC machine without the need for additional small parts based on guidance from this Makezine.com article (https://makezine.com/article/workshop/cnc-panel-joinery-notebook/). It is recommended that further research be conducted to find the best secure joint that can be assembled and disassembled quickly and easily without wear on the joint itself.
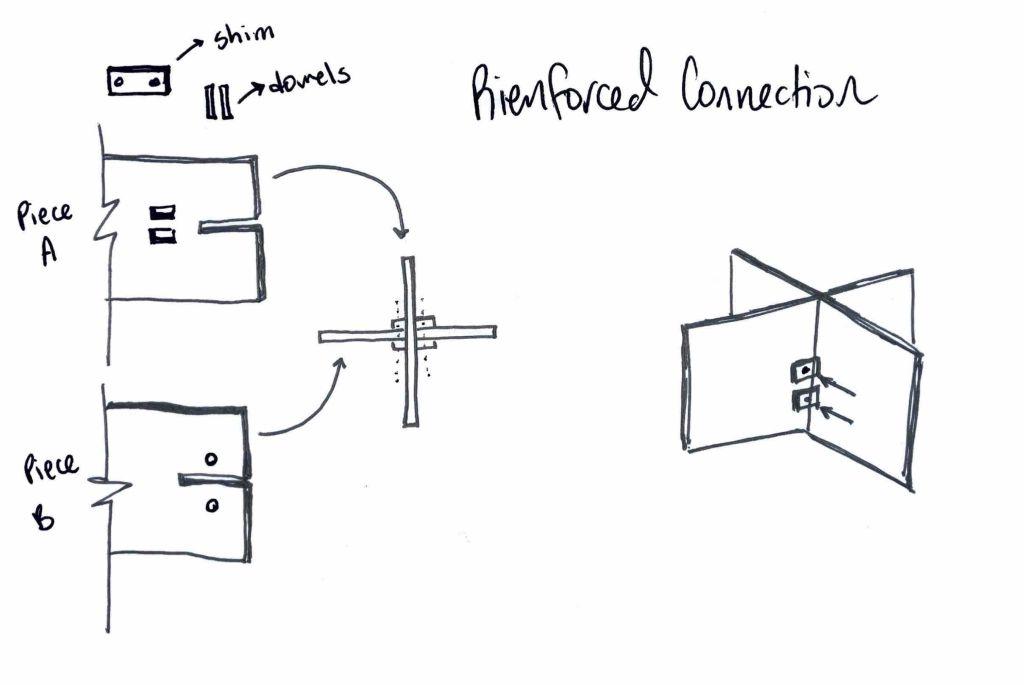
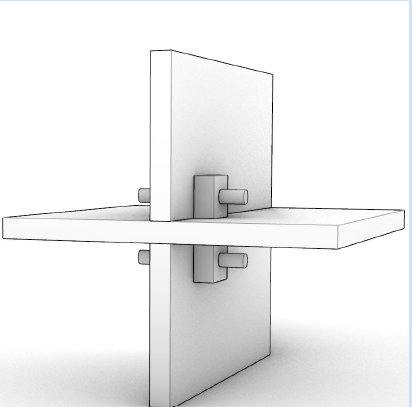
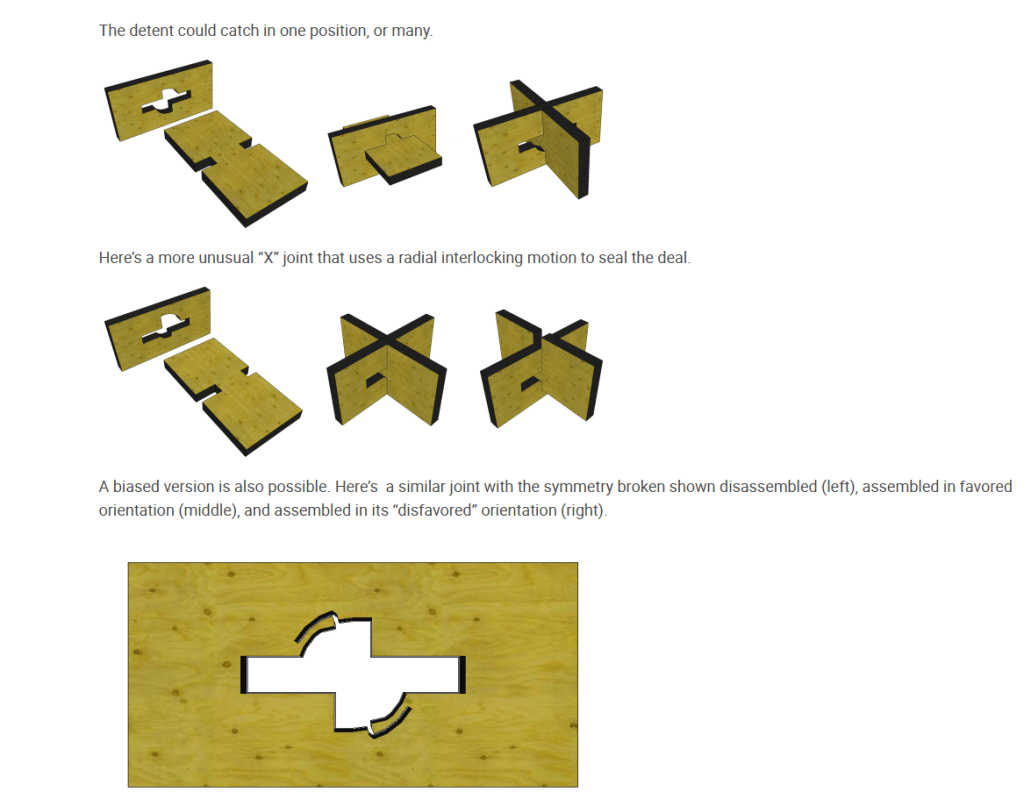
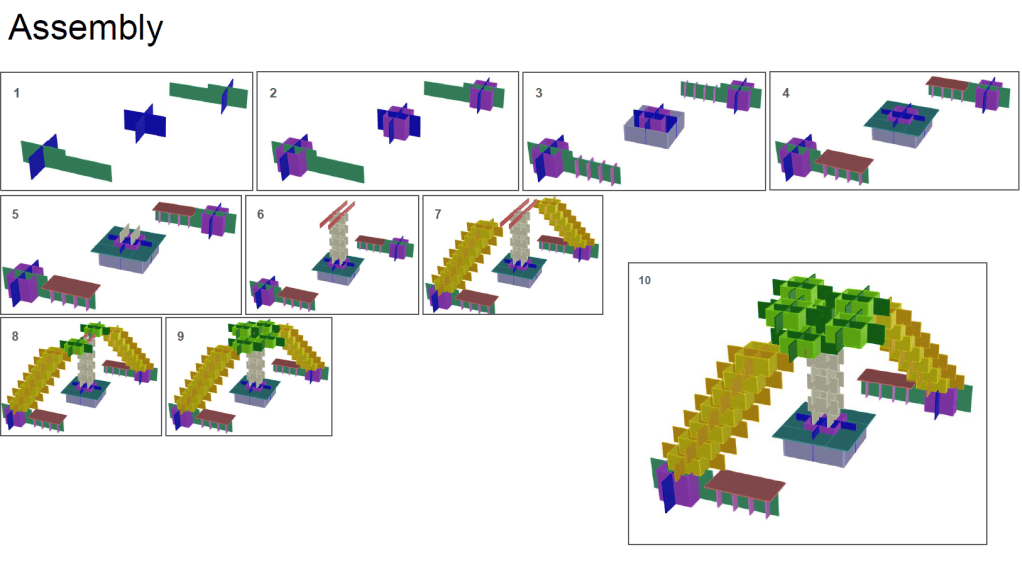
Thinking of the assembly in layers, here is a draft of the steps to complete the full pavilion assembly:
Conclusion
This is just one option for the overall form. Further exploration could be done to use the same kit of parts to create alternate assemblies that fit the specific site and user needs. Future studies could explore placing seating under the lowest parts of the arches to mitigate possible head injuries on the overhead members. An alternative form may be to remove the central pillar and use that material to widen the arches and add more seating on the sides. In this method, designing members that could preform in tension as well as compression would be needed for the twisting arch to be self-supportive. In terms of design concept, the central pillar acts as a grounding point for users to revolve around, representing growing roots where the two arches meet. Additionally, the pavilion could be embellished by incorporating hooks or small holes into the members to attach fabric or potted plants could be placed on the arches to add greenery.


Leave a Reply